
Scripts and Screenwriting
What is your story?
Each story has three essential elements: a beginning, middle and and end. It doesn’t have to be a word-for-word written script, like you’re writing a fictional movie, but a one-page description of your story and the project that serves as a guide or a written map.

Writing Scripts Based on Interviews
Many videos are harder to plot out, such as documentary-style videos where you don’t know what the other person is going to say. However, while you may not know the answers that you’ll get from interviewees, you can still tell your story through the questions that you ask. Think of how those questions tie together to form your story or to answer your research question. Your questions can still have a beginning (eg. “Can you tell us who you are and what you do?”), a middle (eg. “So why is this important?”) and an ending (eg. “Where does this idea go from here?”).
Write out your interviews questions beforehand, about 5 questions for a 2-5 minute piece, for about 3 people. Never interrupt or talk over your subject when interviewing them. Allow them to finish speaking before you start talking again as the the pauses will help in the editing process.
Create a Shot List or Storyboards
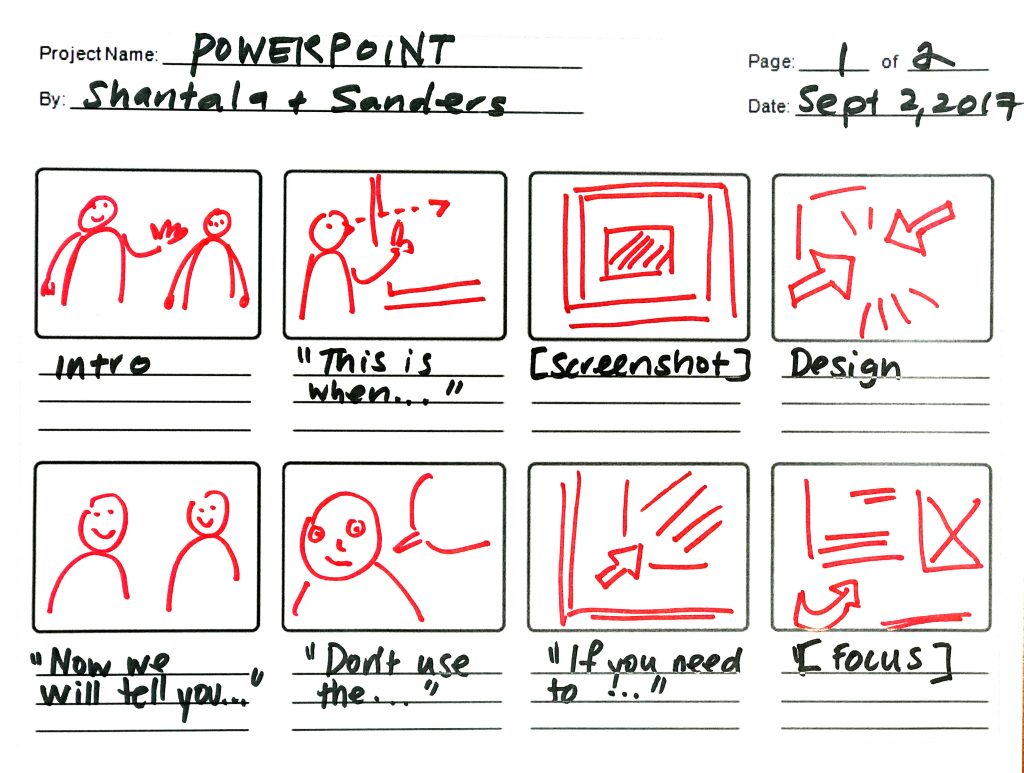
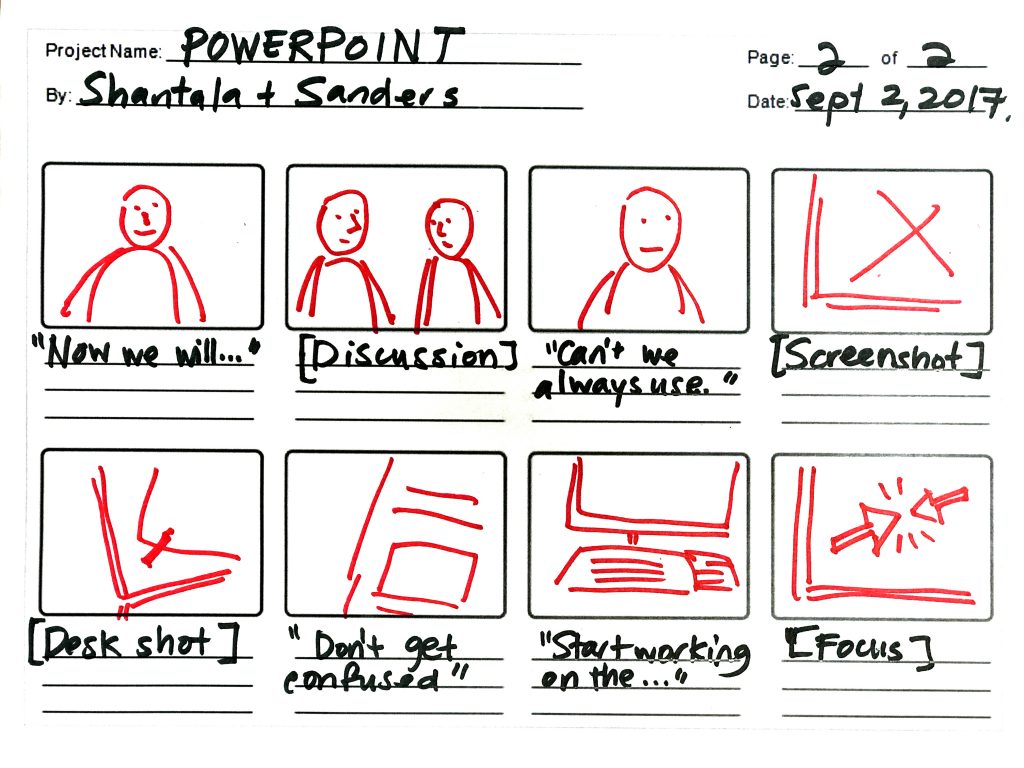
Storyboards can help you provide a visual representation of your shot list and the sequential order of your story. In effect, storyboards can act a visual map for filming, to compliment a script as a written map. Not everyone uses storyboards as some filmmakers prefer to be in the moment and use their creativity, experience and intuition to find the best shots. However, storyboards become useful when you’re working in a group and you need to make sure that everyone understands what the look, shots and story will look like. It helps people to collectively understand what’s going on, especially when you have multiple people involved who may have different mental visualizations of what they picture in the video.
The descriptions below the storyboards can be quotes from dialogue, interview questions or a description of what happens in the shot.
Finish your script with a conclusion that answers your question.
Go over your script and your shot list. Do you have all of the shots that you need? Are you missing anything? It’s always a good idea to take additional shots to use as “B-roll”
Plan for enough time. Give yourself a generous amount of time to shoot. A two-hour setup is not uncommon. Shooting often takes much longer than you think due to the logistics of traveling to your location, moving gear, talking to the subject or other people, ensuring the place stays quiet, setting up the camera and lighting and audio. Plus, there is always the possibility of disruptions or technical interruptions or challenges.
Scout Your Location
Look for the following:
What does the lighting look like? Is there a big bay window that drowns the room in bright sunlight? Fluorescent lights? Are there enough outlets to plug in additional lights and are they on different circuits?
What is the location like? Is there enough space to shoot? Having more space adds depth to the shots, so a larger room can be preferable for depth of field. A larger area also gives you more room to work with, especially if you are using 3-point lighting.
What does it sound like? Is it totally quiet? Are there loud noises such as buses, noisy neighbours, construction, kids playing, heavy traffic or sirens? Are there subtle background noises that you haven’t noticed, such as air conditioners, heaters, dehumidifiers or fans?
Make sure your batteries are charged and you have enough memory to record on. There’s nothing worse than running out of power or having a full memory card with no back-up.
Video Length
The length of your video should vary based on the purpose of the video. A social-media video has a different audience with different expectations – they are watching it purely for some quick entertainment value and they don’t want to invest more than a minute or two. With Educational videos or tutorials, you have more of a captured audience as they are looking to learn something, which can allow the video maker to extend the timeframe.
- Educational Videos – 6 minutes or less
- some studies indicate that you can have successful educational videos 9-12 minutes in length, while others say that 20-30 minutes or even longer is fine. The key thing is that the video must be able to maintain the interest of the audience. Making a video interesting for that much longer requires not only more content, but much more time, energy and assets to produce it (photos, video, music, narration).
- Social media video – 1-2 minutes
- Teaser trailer – 10-30 seconds
- Landing page video – 1 minute
- Customer testimonials – 1 minute
Video length is not set in stone. For educational videos, a TED Talk can be ten minutes but feel like a breeze. An episode of NOVA can be 53 minutes long while documentaries can be an hour and a half to two hours or more, yet they can remain watchable. However, those shows engage the audience in a variety of ways to captivate them and hold their attention. This includes well-written and well-researched material, charismatic and knowledgeable hosts or interviewers, slick animations, graphics, photographs, music, sound effects, quality B-roll footage with multiple camera angles and shots and finally editing that flows to tell the story well. The longer you make your video, you have to ask yourself if you can maintain the attention of your viewers.
Estimating the Length of Your Video
After you have chosen the rough length that you want your video to be, you need to find out how to achieve that target. The general rule for scripting is 150 words per minute. To see how closely it matches to that guide, read out your script at a speed that you think it will be recorded at. Note that this is a guide as people may talk at different speeds and you may leave longer pauses in the editing stage to let the piece “breathe” a little, but 150 words is a good guide to work from.
Pacing, Tone and Music
- Pacing affects how slow or fast the video feels, regardless of its actual length. A video can feel like it has a good pace even when it’s longer, while a short, slow, badly-paced video can feel like it take forever. A video that’s too fast can race through information before it can be taken in by the viewer. Pacing includes the speed of the narrator’s voice, how quickly information is displayed, editing and music.
- Tone is the mood or atmosphere of a video and it turn how it makes you feel emotionally. A narrator’s voice and presentation can affect tone a lot. A lighter, excited, humorous tone can engage the viewer, whereas a flat voice and affect can make the video feel like a sleepy monotone.
- Music can help set the tone of your video, so choose a piece to match what you are presenting. A heavier subject matter with probably have some strings or piano. If your piece is light and informational, choosing a piece with a good beat can help to set the pace for the video, helping to move it along.
- Try to edit out pauses longer than about 2-3 seconds to keep the pace from lagging.
- Edit out any obvious technical glitches. It there’s a still image like a photo or PowerPoint slide, often these parts of the clip can be “patched” over by copying a pasting an earlier part of the still over the glitchy part.